Customizing Your Website Contents
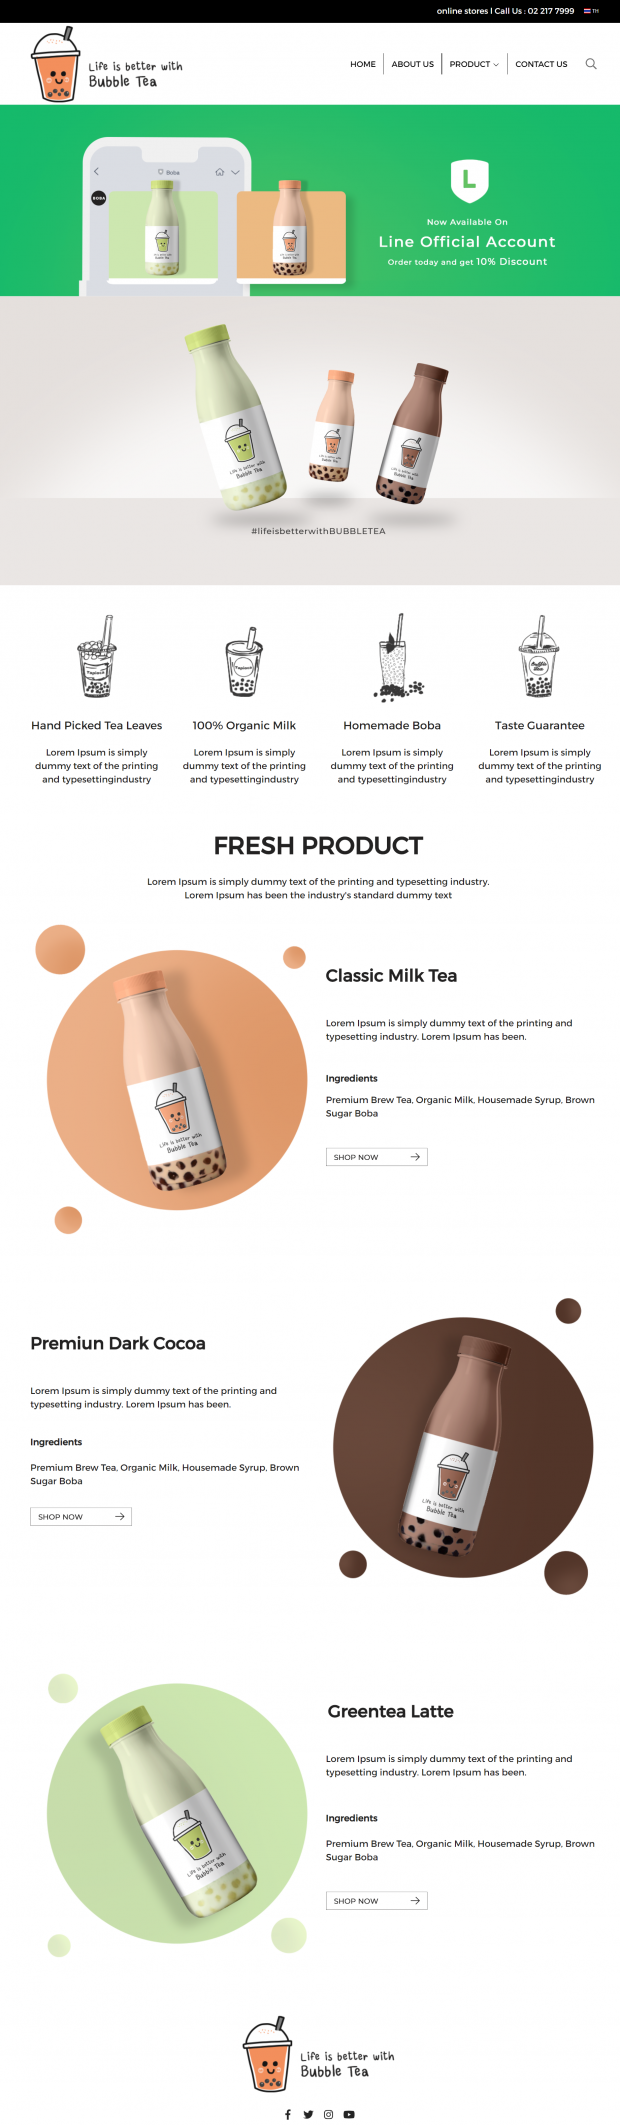
Body section is the main section of web page where each type of content is displayed. You can change the contents according to your page or menu. In this section, there are 13 categories that can be customized, as follows:
- Customize – data in text, image, or video
- Content – detailed information, news, or articles
- Product – information of your product details
- Coupon – discount or promotion
- Product brand – product commercial name
- Contact us – message box to contact the company
- Slide – slide animation of your company pictures or promotions
- Gallery – photo album
- Photos – uploaded pictures
- Forum – discussion forum or blog
- FAQ – Frequently Asked Questions
- Event calendar – company’s event schedule
- Banner ads – advertisement banners
- Instagram feed – pictures from Instagram
- RSS feed – news and article subscription via RSS system
Create the website content
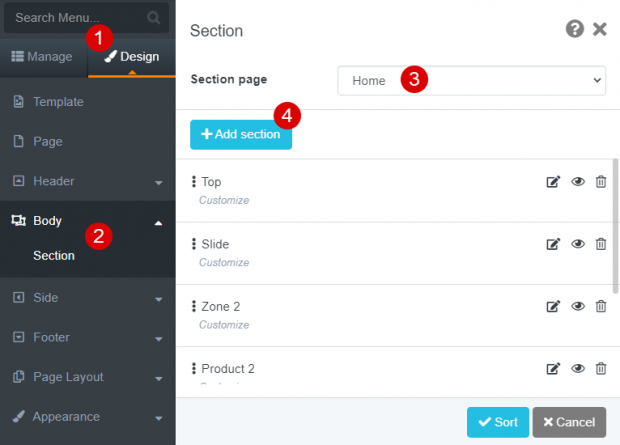
1. Navigate to Design
2. Select Body > Section
3. Select Home on Section page
4. Click Add section button
Additional instructions: If you want to make any page content as a first-page section, you need to create a Static page > Custom page first, then create a section page and designate the page section as the desired page
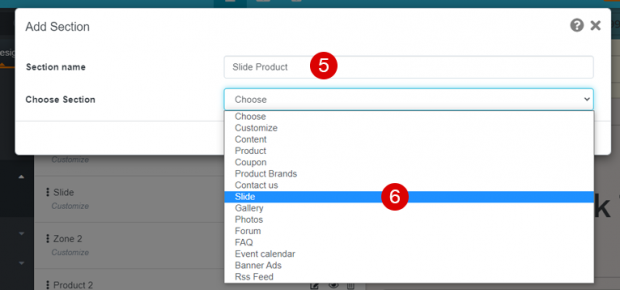
5. Name the section to inform the content. You can easily edit or delete it anytime
6. Choose section type e.g. Slide
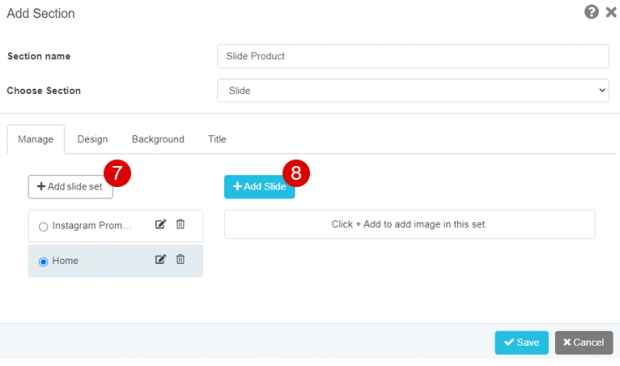
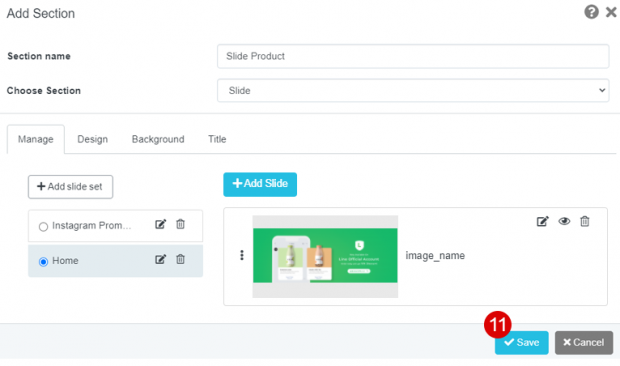
7. Manage tab > + Add Slide Set to create a series of multiple slides and choose the set to be added by images, e.g. Home set However, we do not recommend creating more than 2 sets as it will make your website slower
8. Click + Add Slide button
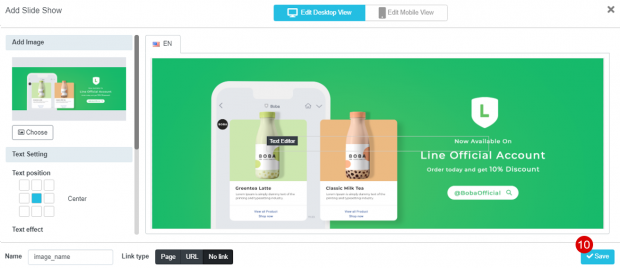
9. Click Browse button to add an image
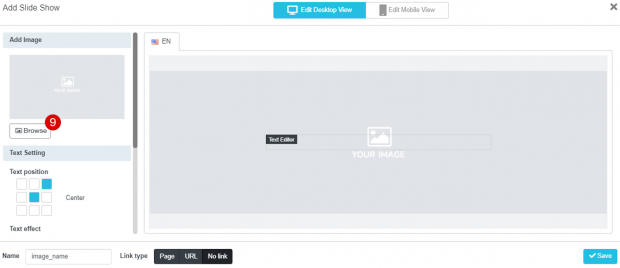
After selecting an image, click Add Image button
Additional instructions: in case you can’t make a slide image in Photoshop, you can add an image and type the text from the system. Customize it with text alignment, text color, as well as adding a link. Link type aims to redirect visitors to other pages while they click the slides or you can leave it empty by choosing No Link
10. Click the Save button
The selected image for the slide will appear and click another Save button. If you have multiple images for the set, do the same steps and don’t forget to click Save button. We recommend adding no more than 5 images so your website would not load too long
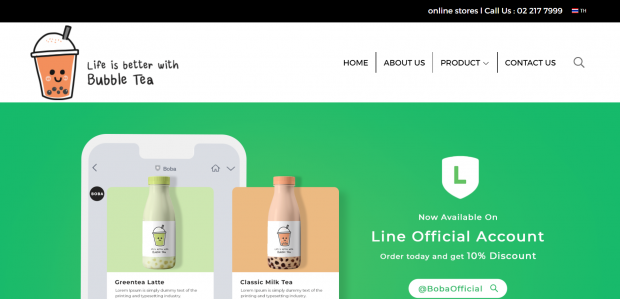
The result after adding Slide section
Edit or delete part of section
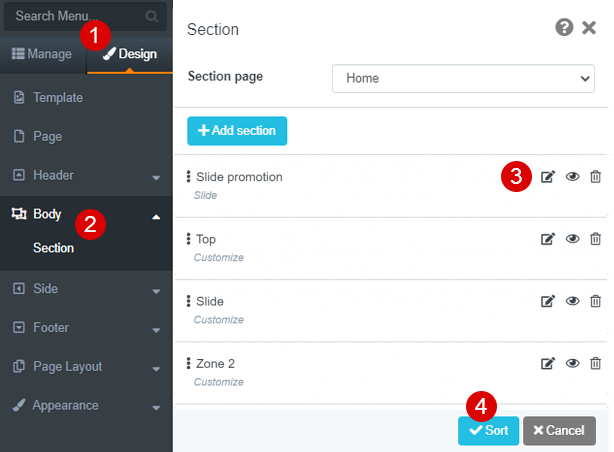
1. Navigate to Design
2. Select Body > Section
3. To edit click icon 1 (pencil icon), to hide the section click icon 2 (eye icon), and to remove the section click icon 3 (bin icon)
4. To sort the section contents, click and drag the three-dots icon on the left side of the content’s name then toggle up/down. Click Sort button to complete your process
The result after managing all contents in the body section
Sabrina Yuka
Business Development at MakeWebEasy